Spoiler alert: At no point should you expect your board to look this good. Image: ASILDA Photography.
I recently decided to shape my girlfriend a surfboard for her birthday. I’d shaped a couple in high school and remember shaping as being fun. It certainly was messy, but not too difficult. The part that excited me about this project though was that I would be glassing the board myself. I talked to a few people at the warehouse where I got my blank and cloth, and I watched a lot of online videos before starting. I won’t turn this into a “how to shape a surfboard” manual; you can find a large number of people offering advice on that topic who know what they’re doing much better than yours truly. What I’d like to do is fill you in on a couple of the little things I would have done differently with the knowledge I have now, along with offering some tips on how to do it affordably.
First thing’s first. The challenge of building a board yourself from start to finish seems daunting. But in reality it’s a very manageable task.
You don’t need a shaping bay. I got by just fine in my backyard. Building a shaping bay is a relatively large investment of time, money, effort and space. Chances are most people who will casually shape a few boards over the years do not need to make the investments required to have a dedicated shaping space. If you have a 12 foot by 10 foot by 10 foot space around your house that isn’t being used for anything important, you may want to consider making it a proper shaping room. A shaping room will probably improve the quality of the board you shape and make the process more efficient, but it still doesn’t mean you need one.
Make sure that whatever space you use is a place where you can make a complete fucking mess. You’ll be blasting foam into the air with a planer like fireworks on the 4th of July. There will be enough foam dust lying around to make it look like you received your own private snow storm. You’ll have fiberglass shards and masking tape scraps and a resin-drip outline of your board on the ground, and most likely, a big, goofy-ass smile on your face.
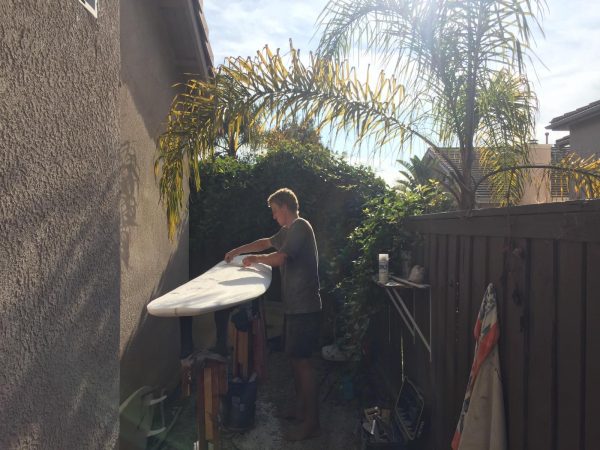
I’ve been using the space behind my house for shaping boards. Being outdoors and facing straight west, it gets direct sunlight for the entire second half of the day. No matter the orientation of your spot, if you choose to shape outside, have patience. There will most likely be a time of day in the late afternoon when the lighting is best. With the sun being low and casting long shadows, you’ll be able to see more detail across you board, helping you balance everything out. Use this time to do most of your shaping. It might take you a week instead of a day, but your board will come out better when you can focus on the details. Shaping outdoors is a little tricky, but it’s nice having the sun on your skin and fresh air coming through your respirator.
Finally, there’s also no need to make specialty shaping stands. If you have a stand you normally use for do it yourself ding repairs, they’ll work just fine.
And now that you have your designated space and your stands set up, there are a few tools you’ll need. Again, you can take it a step further, spend some extra money and get totally dialed in. But this is meant to be more-or-less a minimalist’s way to get started shaping. You’ll need a planer, preferably electric, to take off the top layer of crusty glue from your blank. A rasp to shave and shape your board is also essential. A small sander and an abundance of sand paper from 60-220+ grits are extremely helpful when finishing the board. Get a small hand-saw and a good pair of scissors for cutting cloth and you’re read to go.
The next step is to check over your template a couple of times before getting started. Make sure it’s nicely rounded and there aren’t any bumps along the outline. It’s easy to tell yourself that you’ll shave them down and have everything looking smooth when you actually make the board, but somehow these little spots find a way to stick out and stay uneven no matter how much you focus on making them go away. I know the prospect of digging that saw’s teeth into foam is enticing, but take the extra ten minutes and make sure your outline is all cherry before you trace it onto the blank.
Once you get started, do yourself a favor and keep two of the rail-scraps, as they’ll come in handy later when making a tracing tool to help you prepare the deck during the glassing process.
Once it’s time to start shaping, don’t go too fast. If there’s one overlying lesson I’ve learned, it’s that patience is absolutely crucial in this entire process. You’ll have an idea in mind for what you want the board to be and it will be hard not to gouge away at the mass of white foam. But go slow and trust that eventually a surfboard will emerge. You can always take more foam away, but once you remove it from the blank, you can never ever put it back.
Next, don’t underestimate the difficulty of glassing. When you look up how-to videos online, people will make it look easy. This is because they’re professionals. It’s difficult and requires focus and, like I said, patience. This reminds me, don’t use too much catalyst. Invest in a proper measuring device and read about the proper mixing proportions. Wait until each laminating coat is totally dry before you pick it up, flip it, or try sanding it. Don’t bother with color your first time. I made this mistake and ended up with a gnarly, crooked lap-line that had to be re-cut, sanded, and covered with a big pinstripe that ended up being about an inch thick. Working with clear glass gives you more room for error, which is exactly what you want the first time you try to glass a board. You’ll most likely end up wasting a lot of resin as it drips off the rails of the board. Get two gallons of laminating resin and one gallon of sanding resin, just to be safe. It’s about twice as much as you’ll actually need, but if you try to do a coat of glass and can’t saturate all the cloth, you’ll be bummed. If you’re glassing outdoors, you’ll have one or two little gnats land on your board and get absorbed into the resin. Embrace having these bugs entombed in your stick forever.
While we’re talking about three gallons of resin, we should also talk about having a gallon of acetone. It will save your tools and save you from the burning feeling of resin curing on your skin. Wet resin will get all over everything. If you don’t already have resin-covered shorts and shirts, I suggest donating one entire outfit to be your “shaping clothes.” Get an old pair of shoes and dedicate them to being covered in glass drippings as well.
Just as with the resin, make sure you have about twice as much masking tape as you think you’ll need. Tape jobs go bad and have to be done over. You’ll be working with a lot of dust, which will stick to and ruin the tape’s adhesive properties. When taping off the deck or rails, make sure that you go over your tape line two or three times, preferably with a hard edge, to make sure it all sticks where you want it to. If there are any little gaps, even the smallest holes will give you a big drip line under what you wanted to be a clean edge.
When you’ve shaped your stick and done your best with the glassing, be careful with your sander. Ideally, just hit the super obvious bumps and edges and do the whole thing more or less by hand. It takes longer, but again, have patience. In haste, I made the mistake of sanding through the glass down to the foam with the palm sander and had to do a ding repair on the board before it was even finished. Long smooth passes with sand paper, by hand, will get you where you want to be. Also keep in mind that if you’re sanding you can’t touch your eyes or pick your nose. It’s also a good idea to leave your genitals alone. It doesn’t matter how bad you have to pee. Hold it until you can rinse your hands off. You don’t want the “fiberglass itchies” in those sensitive areas.
Finally, you’ll tackle the fins and leash plug. I don’t have a router so I simply made a leash loop and did glass in fins. The leash loop is simple enough. You’ll just sand the deck, saturate some fin rope, tape a pencil to the deck, and mold the rope over the pencil. When it’s getting tacky, pop the pencil out, and there’s your leash loop. Glassing in a fin, however, can be difficult. You can look up the proper way to do it online. But for cryin’ out loud, make sure the thing is straight. Watch it for a little while and make sure it doesn’t shift, because if it does you’ll be in a world of hurt and lose at least half a day trying to get the fin off only to prepare both the fin and the board for a second go. It’s like watching paint dry, but obviously making sure your fin is straight is essential.
I hope these tips help you steer clear of some avoidable problems while shaping your backyard board. Have fun and don’t be too hard on yourself. Chances are if you take the cheap route your board will have some lumps in it, but it will still work. Everything mentioned above ran me just over $300 total, with the tools and materials included. Used boards cost that much these days, so you might as well build exactly what you want and have a week of fun challenges to go along with it. It takes time to master art of any form. Sculpting a surfboard is no different. Michelangelo didn’t crank David out on his first try, Jerry Sawitz didn’t throw a perfect pot right off the bat, and Malcom Campbell has spent a lifetime perfecting the crafting of his own beautiful boards. Every artist needs to start somewhere. Creating something beautiful is great, but creating something beautiful and functional that you can use to surf is totally awesome.