
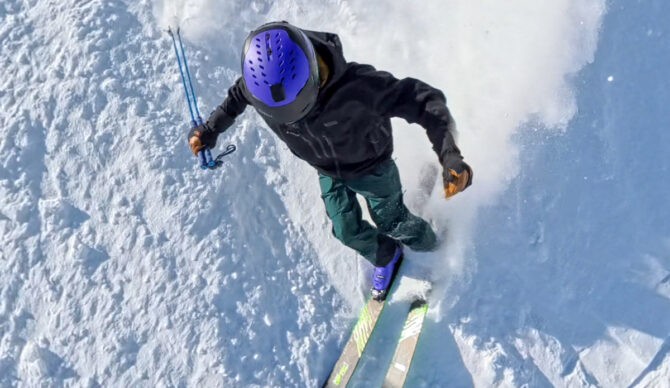
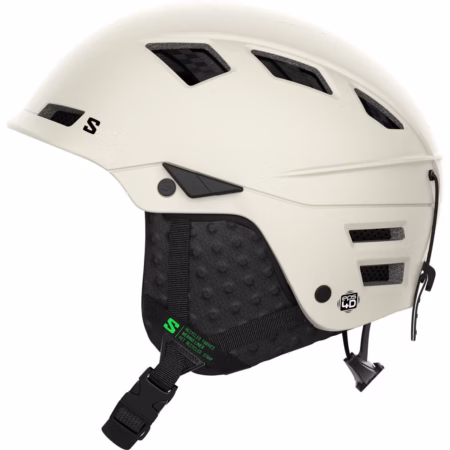
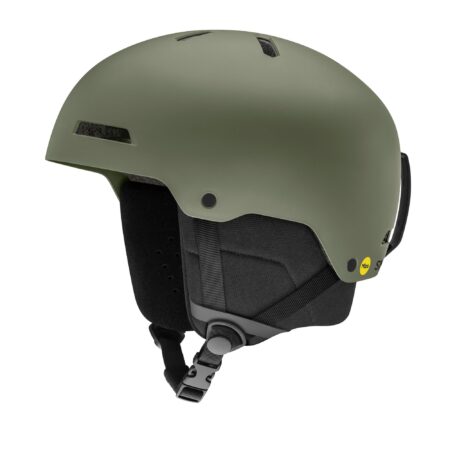
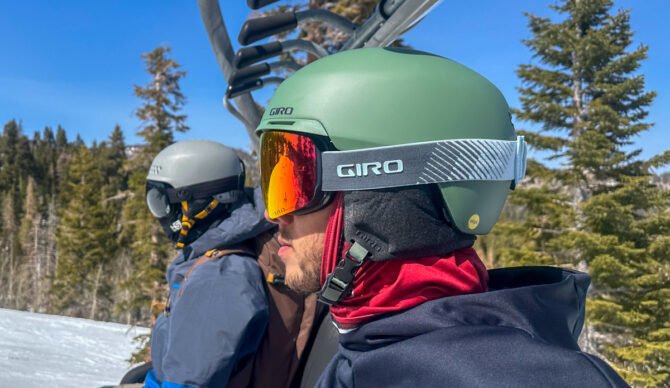
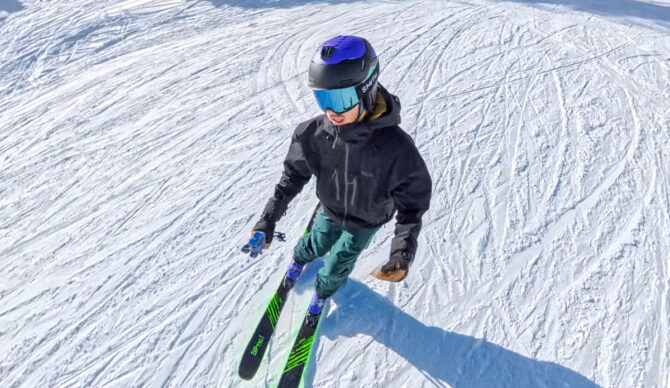
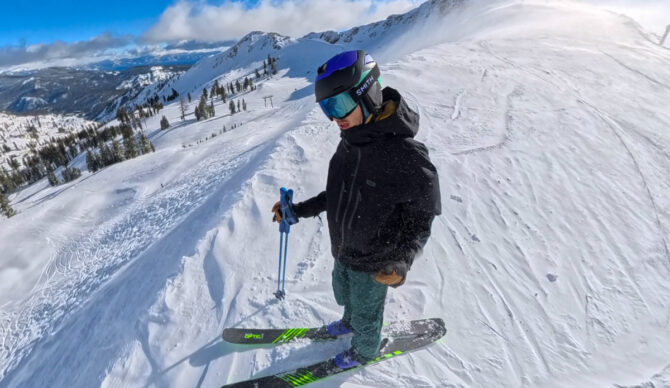
Smith’s Vantage 2 is our top pick this season. Photo: Will Sileo//The Inertia
Skiing has been around for thousands of years, and for the vast majority of that time, skiers did not wear helmets. To be fair, up until about 100 years ago, skiing was simply a means of moving through the mountains, not the high-octane adventure sport that it is today. But even as skiing became recreational in the early 1900’s, helmets wouldn’t be widely adopted for another 100 years or so.
Nowadays, at most resorts here in the US, it’s hard to find a skier who isn’t wearing a helmet. The reason behind this may be twofold: first of all, the general public is making smarter choices for their personal safety, and second, helmets are now lighter, more comfortable, and better designed than ever before. And with the rise in popularity, so too has come a massive expansion of options. With so much to choose from, we figured our readers could use a bit of buying advice from those they trust the most — The Inertia’s Gear Team.
The Best Ski Helmets of 2026
Best Overall Ski Helmet: Smith Vantage 2
Best Budget Ski Helmet: Outdoor Master Kelvin 2
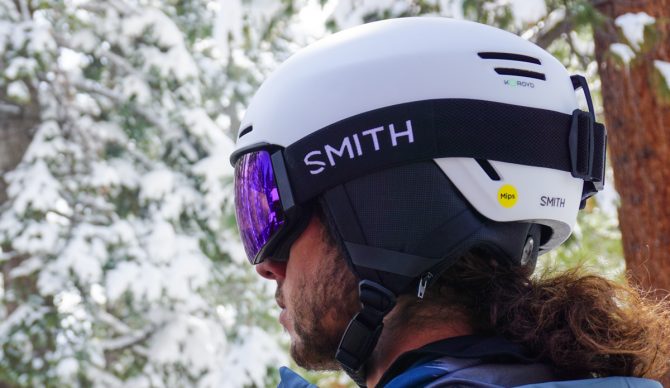
Best Mid-Tier Resort Helmet: Smith Method Pro
Best Backcountry Ski Helmet: Salomon MTN Lab
Best for Park/Freestyle: Bern Hendrix Mips
Jump To: Best of the Rest | Comparison Table | How We Tested | Buyer’s Guide
Related: Best Ski Bibs | Best Ski Jackets | More Ski Gear Reviews
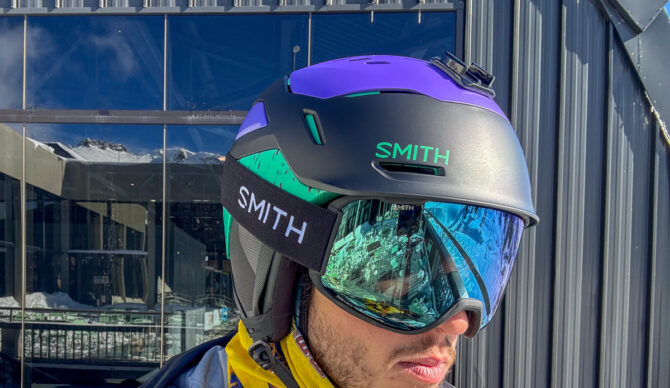
Photo: Will Sileo//The Inertia
Best Overall Ski Helmet
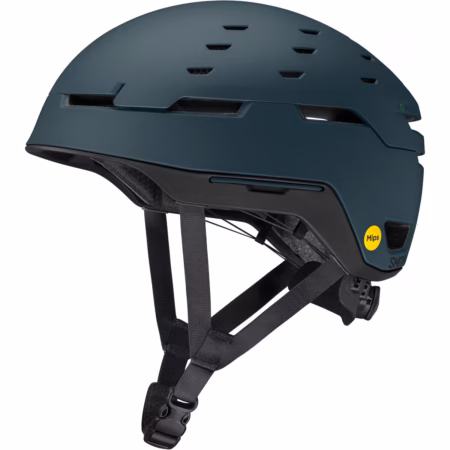
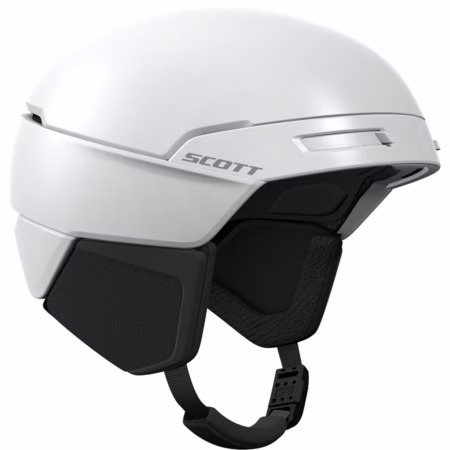
Smith Vantage 2 ($295)
Construction: Hybrid
Weight: 18oz / 500g
Key Features: 40 vents (top and sides adjust separately), Fidlock magnetic buckle, Mips, full Koroyd
Pros: Top of the line features and protection, lightweight, well-ventilated
Cons: While you get a lot of bang for your buck, $300 is still expensive for a helmet
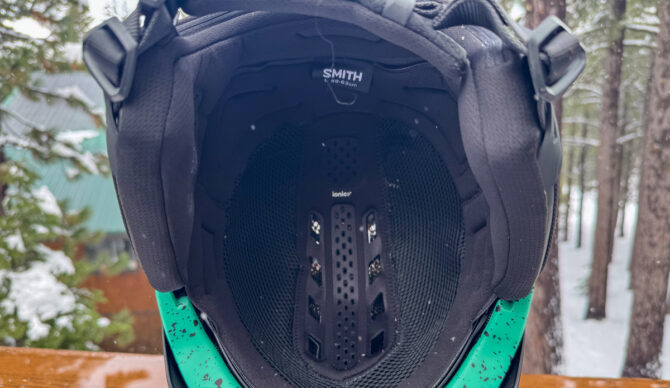
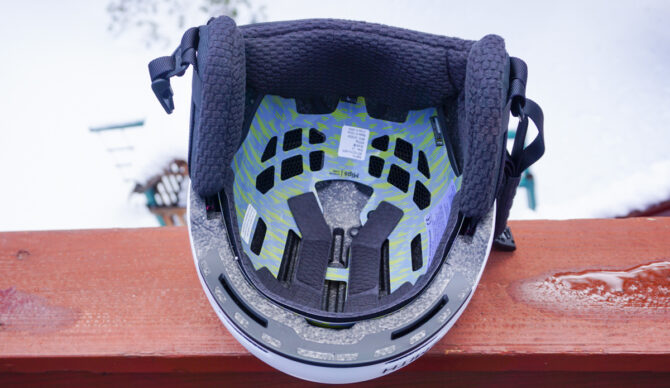
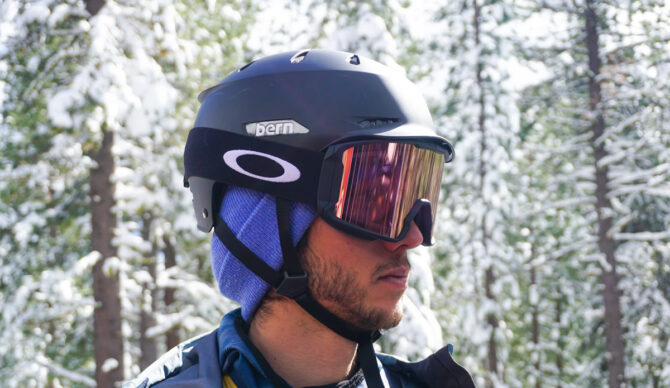
Smith’s latest flagship offering for the 2025/2026 season, the Vantage 2, does not disappoint. For the past two years, the Vantage been at the top of Smith’s line and the top of the ski helmet market. The iPhone Pro of ski helmets, it’s feature-packed, well-made, maybe a little overpriced, but if you’re looking for best-in-class features comfort, ventilation, and light weight, it’s hard to beat.
New for this season, Smith has released the Vantage 2, and so far, it’s everything that it’s cracked up to be, with more features and a better value than the OG Smith Vantage. The same overall design as the original Vantage, the Vantage 2 combines a 3-piece construction with full Koroyd, a step-up over the Vantage 1’s zonal Koroyd. Instead of 21 vents, there are now 40, and the top and side vents adjust separately. A fidlock magnetic buckle has been added for one-handed buckle operation (a small but mighty upgrade), and finally, the brim has been cut down slightly for less of a techy look while still providing a nice overhang on your average pair of goggles to eliminate gaper gap.
Bang for buck improves as well. Despite all these upgrades, the price only climbs $20 over the OG Smith Vantage that, with recent price hikes due to tariffs, was starting to feel a little expensive for what you get at 275. And in testing, it delivers. We found the Vantage 2 to be supremely comfortable and light for all-day wear, versatile for deep cold and spring sun with the ventilation, durable, and stylish. If you’re looking for the best overall ski helmet, especially when it comes to protective tech (Mips, Koroyd) and features, look no further.
Read our full review of the Smith Vantage (original version) here.
Check Price on REI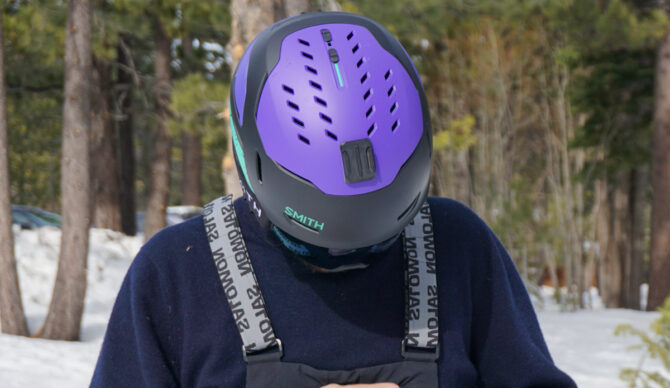
Photo: Ken Cox//The Inertia
Best Budget Ski Helmet
Outdoor Master Kelvin 2 ($60)
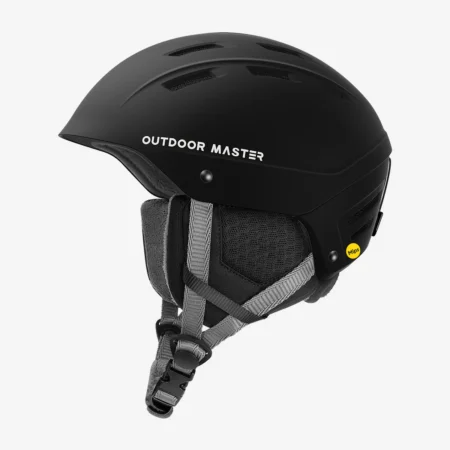
Construction: Hardshell/Injection Molded
Weight:
Key Features: Mips, dial-adjusted fit, audio-ready earpads
Pros: Sub-$100 price with Mips, solid features
Cons: Not the best fit, especially with low-profile goggles, runs warm (but the lining is removable)
Outdoor Master’s Kelvin helmet has generated some buzz in the past year or so as a cheap option that doesn’t compromise on safety. While there’s a lot more to the story of “how safe a helmet is” than in-lab testing, Virginia Tech’s Snow Sports Helmet Ratings for 2025 place the Kelvin 9th out of the 48 helmets that they tested, a fact that surprised us, given the brand’s relative anonymity compared to the big names in snow safety, and the helmet’s sub-$100 price.
This year, the OG Kelvin is being replaced by the Kelvin 2, which improves the ventilation but otherwise leaves the already great design untouched. We got our hands on the Kelvin 2 and were very impressed with what you get for the price. It doesn’t wrap the head quite as nicely as a higher-priced lid like the Smith Vantage 2 or Smith Method, and can be tough to line up with lower-profile, especially cylindrical goggles, but for those of us who only ski a few times or so per year, or are looking to dip their toes into the sport without breaking the bank, the Kelvin 2 is a compelling option. It runs a bit warm, but for spring days, the earpads and fleece lining are removable.
As far as features go, the helmet has a surprising number of premium-esque features, including a plush fleece lining, audio-ready earpads, a dial-adjusted fit, and a wide variety of colors to choose from. The Kelvin 2 also adds on Mips – and there’s a non-Mips version for $10 off the listed price above.
Check Price At Outdoor Master Check Price At Amazon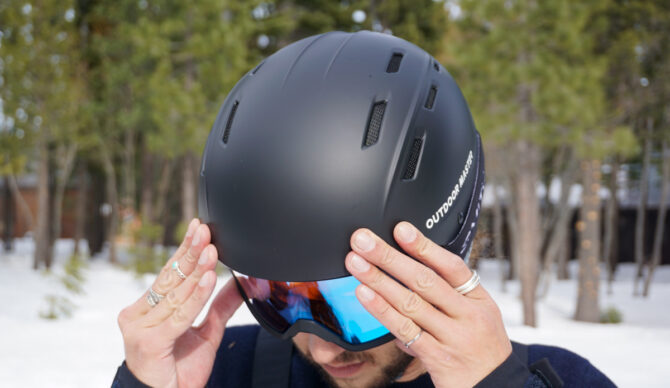
Photo: Ken Cox//The Inertia
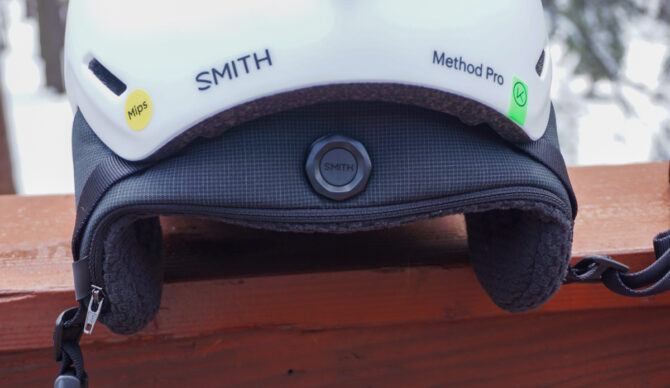
Best Mid-Tier Resort Helmet
Smith Method Pro ($185)
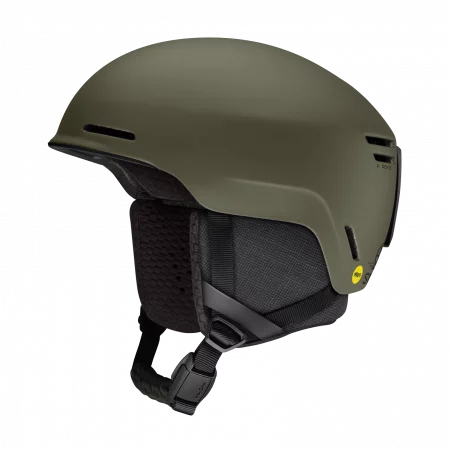
Construction: In-mold
Weight:
Key Features:
Pros: Great value for a protective, comfortable, fully-featured helmet that’s lightweight and stylish
Cons: Fixed vents, in-mold construction is not the most durable
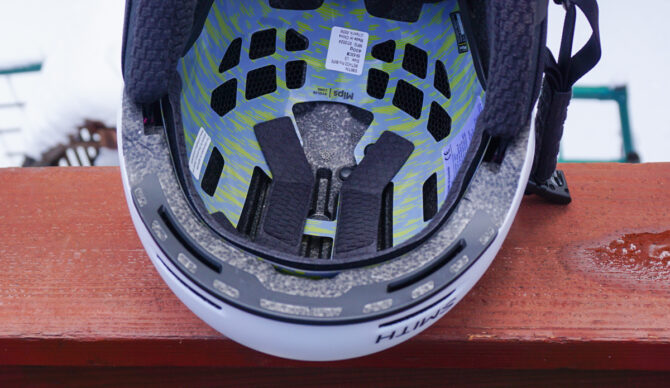
For a top-tier, no-fuss, lightweight ski helmet with all the protection tech and clean, understated looks that go well with just about any style of ski wear, from trim to oversized and baggy, the Smith Method Pro takes the cake. Priced at $185, it’s a mere $25 more than the Smith Method ($160), but brings a suite of handy upgrades that more than justifies the price bump in our books. Both helmets feature protective technologies such as Mips and zonal Koroyd, nine fixed vents, and a wide variety of colors to choose from. The Method Pro tacks on a Fidlock magnetic buckle, dial-adjustable fit, and a more comfortable lining.
Another big plus of this lid is the weight. Thanks to the in-mold construction, it’s featherlight at 396 grams (The Method isn’t much more at 421). That makes it a viable choice for some backcountry use as well, but it’s not super well-optimized for uphill-wear as it would likely run a bit warm.
The main downsides here are the fixed venting and in-mold construction. We found the helmet strikes a great balance between warmth and ventilation, but on the coldest days, you’ll likely want to add a bit of insulation underneath in the form of a buff or beanie. For how small the vents are, they put in work, with channels running through the helmet to vent air out the back while you move. The dial-adjustable fit helps on this score, making it easy to size up to accommodate extra insulation – just make sure you give yourself the necessary wiggle room by sizing up if you’re on the cusp of two sizes. Luckily, the helmet is available in four different sizes and two different fits, regular and a round contour fit.
For spring skiing conditions, the earpads are removable. As for the in-mold construction, that sleek exterior is simply going to show its wear faster than a hardshell or hybrid design, but this is not unique to the Method. Overall, the Method Pro wins with its lightweight comfort, sleek styling, and simple, user-friendly design at a reasonable price.
Check Method Pro Price At REI Check Method Price At REI
Photo: Ken Cox//The Inertia
Best Backcountry Ski Helmet
Salomon MTN Lab ($290)
Construction: In-mold
Weight: 365 g
Key Features: Merino lining, headlamp clips, multi-norm certified
Pros: Lots of backcountry-specific features, triple-norm certified, lightweight
Cons: Pricey, no Mips
Backcountry ski helmets need to tick a lot of boxes. Protective, lightweight, well-ventilated (for the uphill), easily packable… that’s not even starting on the nice-to-have extras like multi-norm certifications for biking and climbing, headlamp clips, etc, etc. But that’s hardly surprising. The backcountry is one of the more demanding environments we put ourselves in as humans and winter enthusiasts.
The helmet that ticks the most boxes for us is the Salomon MTN Lab. Comfortable, featherweight, multi-norm certified, with easy adjustability, and a comfy merino-wool lining that’s easily removable, headlamp clips, the list of features goes on. Importantly, however, those features don’t come at the cost of weight. The helmet is the lightest that we tested, outdone only by extremely minimalist skimo/mountaineering lids like the Dynafit DNA, which we did not review for this article.
Another big plus for this helmet is the comfort. Helped by the merino wool lining and removable earpads, this is one of the most comfortable ski helmets we’ve tested, even among resort-oriented options. We’ve often struggled with comfort among backcountry helmets as they try to shave every gram of weight off, so the fact that the MTN Lab is both lightweight and supremely comfortable is a hard-to-beat combo.
The biggest downside we experienced was durability due to the lightweight in-mold design. Not that it will fail critically when you least want it to, moreso that its relatively soft shell material will show small dents and dings more easily than most, worth keeping in mind if you’re someone who’s hard on their gear.
A close second here is the Smith Summit (below), which, for a bit cheaper ($260), tacks on a Mips lining. However, it’s a decent bit heavier than the MTN Lab, and not quite as comfortable. We’re also fans of the Sweet Protection Ascender, further down for its low-profile build and resulting small pack size. However, we prefer helmets that wrap around the back of the head for better protection, while the Ascender sits more on top of the head.
Check Price At Backcountry Check Price At EVO
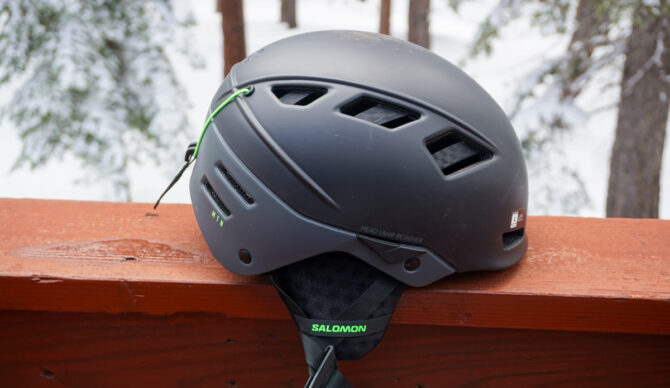
Photo: Will Sileo//The Inertia
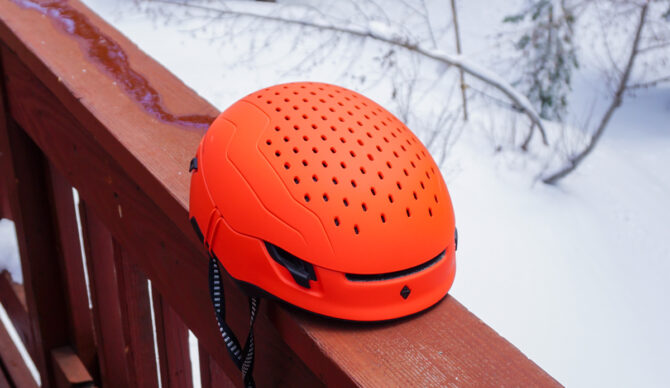
Best for Park/Freestyle
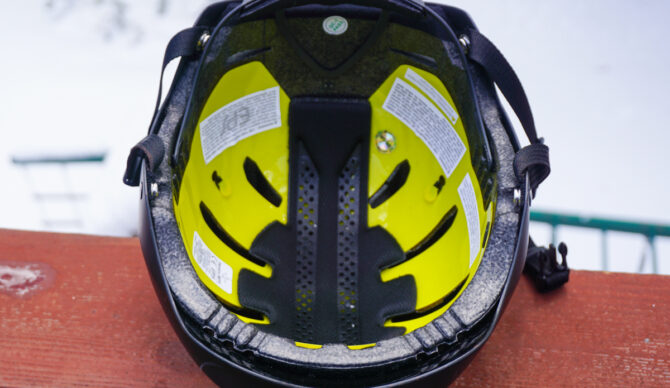
Bern Hendrix Mips ($150)
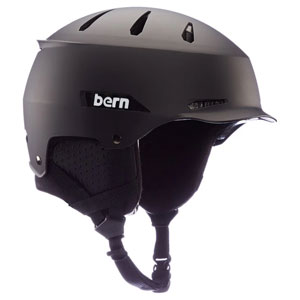
Construction: Hardshell/Injection Molded
Weight: 500 g
Key Features: Bike and ski certified, brim
Pros: Great style, comfortable, durable hardshell design
Cons: Lacks modern features, non-adjustable vents open straight to the lining
(personal favorite styling, Giro Ledge, Smith Rodeo, also good options)
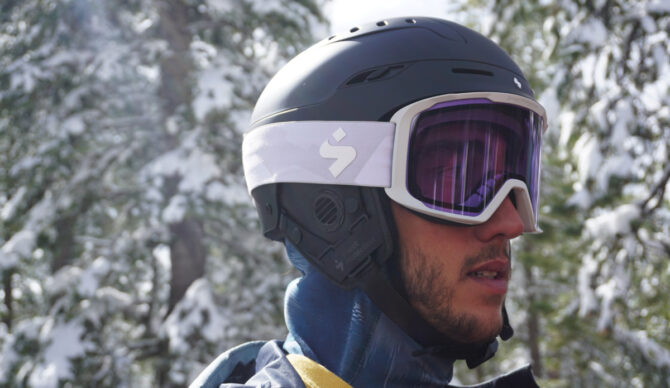
If you’re not yet acquainted with Bern, let us introduce you. No-frills hardshell construction. Multi-norm certifications for year-round use. Classic, bordering on retro park styling. A brim on most of its helmets that aids with goggle compatibility. An easily removable lining and dial-adjustable fit let you rock the beanie-under-helmet look. Bern combines a timeless “park-style” shape with high-quality, no-frills construction and a solid price point. What more could you ask for in a park lid?
In testing, we’ve truly fallen in love with the Bern Hendrix as a one-helmet solution for year-round use. As spring turns to summer, we remove the inner lining, add the “summer pads,” and it becomes a stylish helmet for skating and biking. Being introduced to the helmet in a snowsports capacity, our tester was surprised to see how popular it is as a bike helmet in an urban environment such as the Bay Area.
If you’re someone who prioritizes the latest features, this likely isn’t the helmet for you. But if you prefer high-quality durability and versatility for year-round use, with serious park/freeride cachet, Bern is the way to go.
Check Price At Backcountry Check Price At EVO
The Bern Hendrix has all-season certifications. Photo: Will Sileo//The Inertia
Best of the Rest
Runner-Up Best Overall
Sweet Protection Switcher ($285)
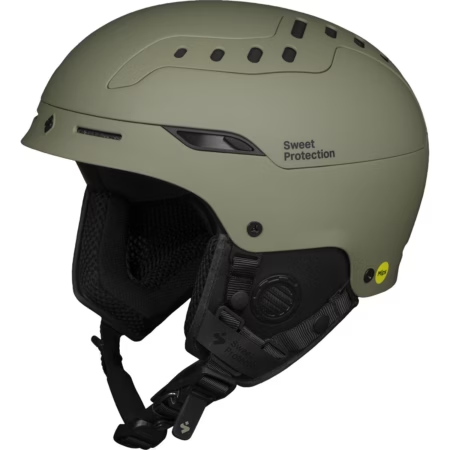
Construction: Hybrid
Weight: 600 g
Key Features: Dial-adjusted vents,
Pros: Well-ventilated, protective, durable.
Cons: Earpads are audio-chip compatible, but start to hurt after a while of use, heavy
Sweet Protection’s specialty is headgear, and it shows with the Switcher. The brand’s most fully-featured offering, it has all the bells you could ask for, and then some. The vents provide the second-most adjustability of any helmet we’ve tested, with a dial on the back of the helmet that adjusts the top vents, and sliders on either side for adjusting the front and side vents. Overall, it’s about the same adjustability as the Smith Vantage 2, but the Vantage 2’s vents open wider, letting you really air things out if you heat up. Like the Vantage 2, the Switcher uses a hybrid construction, combining in-mold and hardshell components to reduce weight while preserving durability in the right areas. However, it runs a good bit heavier, at 600g compared to 500g for the Vantage 2.
Protection-wise, the helmet uses Sweet Protection’s top-tier tech, including a proprietary Impact Shields liner that helps dissipate the force of an impact, and, of course, Mips. The helmet received a solid rating (17 out of 48) in Virginia Tech’s Ski Helmet Ratings, 2026 edition, but notably, Sweet Protection’s Trooper, a higher-priced option that prioritizes protection, performed even better, ranking 7th overall.
Check Price At REI
Photo: Will Sileo//The Inertia
Runner-Up Best Budget
Smith Rodeo ($105)
Construction: Hardshell/Injection molded
Weight: 550g
Key Features:
Pros:
Cons:
Gosh darn, but if it isn’t somewhat impossible to make any ski helmet review a Smith helmet review. The budget category has recently been a weak spot for Smith. The Smith Holt held the crown for Best Budget for years, but then the Giro Ledge came along, adding Mips and a more comfortable lining for just a bit extra. Thanks to tariffs, however, prices have jumped up a bit recently, shaking up the budget category and making room for newcomers like the Smith Rodeo to sneak in.
The Smith Rodeo is very similar to the Giro Ledge, featured in our Best Snowboard Helmets guide. Decidedly park-style options, both helmets have a skate-inspired design with fixed vents, easily removable liner, and a hardshell exterior. However, the Rodeo is $20 cheaper and has a dial-adjusted fit instead of the Ledge’s more basic stretch-fit system. Initially, we had some concerns about the durability of the dial-adjustment setup with the liner removed, but as our testing has continued, we’ve been very impressed with how it’s held up. In the end, we had to give the “best budget” nod to Outdoor Master’s surprisingly good Kelvin 2, but for something a bit more stylish, with the cachet of the Smith name brand, this is a worthy upgrade. If you aren’t a fan of the styling of the Smith Rodeo, other similarly-priced options in the lineup include the Scout Mips at $120.
Check Price At REI
Photo: Will Sileo//The Inertia
Runner-Up Best Backcountry
Smith Summit ($260)
Construction: Hybrid
Weight: 448g
Key Features: Mips, Zonal Koroyd, triple-certified, Boa fit system, headlamp routing
Pros: Protective, minimalist, great fit
Cons: A touch heavy compared to other backcountry designs, not the best for resort use
Smith’s Summit is built for early alarms and long skin tracks, not chairlift laps. And that’s exactly why it shines in the backcountry. Developed with Cody Townsend, the helmet keeps things stripped-down and purposeful, with features that actually matter once you’re out of bounds. There’s a dedicated headlamp routing system for pre-dawn missions, pack-attachment points for carrying it when the climb heats up, and a low-profile BOA fit system that tucks neatly into the shell so it doesn’t snag inside your pack.
Ventilation is excellent, which means you can leave it on during high-output climbs without overheating. Despite the minimal feel, the Summit doesn’t skimp on protection either, pairing MIPS with zonal Koroyd and earning triple certification for alpine skiing and mountaineering standards. With Smith goggles, we saw very little gap at the brow, keeping your setup looking clean and sealing out the weather where it counts. However, it’s not the lightest design we tested. That award goes to the Salomon MTN Lab, which is also a decent bit more comfortable with its soft interior lining, earning it that Best Backcountry Ski Helmet award. Worth noting, however, the MTN Lab doesn’t have Mips, if that is a priority for you.
If you’re looking for a one-helmet quiver killer for in-bounds and some backcountry use, this might not be the helmet for you. There are no ear pads, no real liner, and no way to close the vents, so it can feel breezy when the temps drop. The upside is flexibility: the BOA system makes it easy to fine-tune the fit over a beanie or ball cap, depending on the day. If you spend most of your time touring and want a helmet that disappears on your head and in your pack, the Summit is a killer option. But if you’re splitting time between the skin track and the lift, something more insulated and all-around like Smith’s Method may be the better one-helmet quiver.
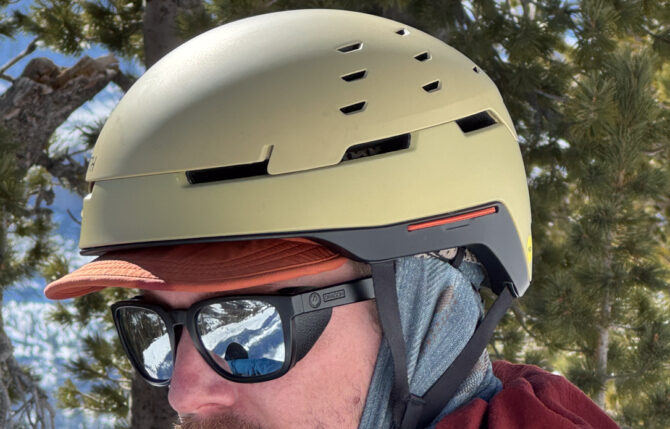
Photo: Dylan Heyden//The Inertia
Premium Features, Understated Style
Giro Owen Spherical ($280)
Construction: In-mold
Weight: 514g
Key Features: Mips Spherical, dialed fit, magnetic buckle
Pros: Minimalist styling, innovative venting system, comfy liner, works well with a beanie
Cons: Vent adjustability is on the inside of the helmet, pricey
The Giro Owen Spherical sits in a sweet spot between low-key style and high-end protection. It leans into a clean, skate-inspired look, but underneath that simple shell is some of Giro’s most advanced safety tech. The Owen uses Mips Spherical, an upgraded version of Mips that has a ball-and-socket system with two independent layers of foam that move against each other rather than the more traditional yellow plastic Mips lining that is less-integrated into the helmet. Giro also mixes in EPP foam, which rebounds better than traditional EPS, helping the helmet stay more resilient after impacts.
On the comfort side, Giro nailed the details. The magnetic buckle makes for easy one-handed operation, the rear dial lets you fine-tune fit quickly, and the ear pads are soft without totally muting what’s happening around you. The liner feels plush, and the fit works well even if you like sneaking a thin beanie underneath on colder days.
Where the Owen shows its minimalist roots is in adjustability. Vent control lives inside the helmet, so changing airflow means popping it off and fiddling with a small toggle rather than flipping a switch mid-run. Venting is also more directional than wide-open, with no top vents, so it’s not the airiest lid on the hill. Still, for riders who want a helmet that looks understated, fits beautifully, and quietly packs serious protection, the Owen Spherical remains one of Giro’s most refined designs.
Read our full review of the Giro Owen Spherical here.
Photo: Dylan Heyden//The Inertia
Great Ventilation with Clean Styling
Scott Flow Pro Mips ($230)
Construction: In-mold
Weight: 500g
Key Features: Mips, Fidlock magnetic buckle
Pros: Lightweight, comfortable design
Cons: Shows wear quickly, audio-ready, but gets uncomfortable with extended wear
Scott’s Flow Pro has a lightweight, airy design with top-tier protection, a clean design, and great ventilation. Although it only has vents on the front and back of the helmet, internal channels help keep the air moving and your temperature regulated, especially as you’re moving, to keep air entering from the front helmet vents.
The helmet is super-comfortable, making it a great choice for bell-to-bell skiing. Worth noting, the earpads can feel overly full with audio-chips added, pressing on your ears and getting uncomfortable by the end of the day, so this wouldn’t be our first choice if you like to rock a helmet-audio system.
Durability-wise, we found the lightweight in-mold design to show wear faster than most, picking up a number of small dings from rattling around in the back of the car after a day of skiing. However, that has no impact on the helmet’s protective capabilities. Though it wasn’t a part of the most recent Virginia Tech Snowsports Ratings, independent online reviews point to the helmet’s strong crash protection capabilities.
Check Price At Backcountry Check Price At scott
Photo: Will Sileo//The Inertia
Another Great Backcountry Design
Sweet Protection Ascender ($250)
Construction: Hybrid
Weight: 448 g
Key Features: Pack-flat design, headlamp/goggle straps, Mips, dial-adjusted fit
Pros: Packs ridiculously flat for easy carrying, super-ventilated
Cons: Flat design reduces protection, can feel top-heavy
Sweet Protection has a compelling backcountry design with the Ascender. With a very shallow shape, it’s very packable, lying quite flat in or on most packs. Supremely well-ventilated with over 100 vents on the helmet, as well as the shallow fit, this is a great choice for objectives that require uphill travel with a helmet on. However, for more vertical ascents (climbing), and while going downhill, the fit can feel a bit top-heavy. Not horribly so, but worth noting. Despite that, it’s triple-norm certified for skiing, biking, and climbing. The on-head design also has us thinking a bit about crash protection. Make sure you’ve got things well cinched down when riding – we’re a bit concerned that if the helmet were to shift too far forward or back in a crash, it might expose the head to impacts in a way more classic ski helmets would not.
The helmet has a dial-fit system that neatly tucks into the shell of the helmet when not in use, and cinches down nicely when worn to make the most of the MIPS impact system. Other features include a clip system for headlamps or goggles, and a hybrid shell for added impact resistance. At 430g, it’s fairly lightweight. We almost expected more weight savings from the low-profile design, but the added Mips protection and hybrid design add some weight. Without any sort of liner, both us and the brand recommend wearing this one with a beanie for better comfort.
Check Price At Sweet Protection
Photo: Will Sileo//The Inertia
Honorable Mentions
Sweet Protection Daymaker Mips ($160): A new, mid-tier design from the iconic brand, the Daymaker is a compelling, well-ventilated, and lightweight (451 g) design. We’ve gotten our hands on it to judge the overall feel, but testing has been delayed as we have yet to get our hands on the right size. We’ll update this review once we do so, but suffice to say we’re impressed with what we’ve seen so far.
Giro Taggert ($200): The Giro Taggert sports a very similar design to the Smith Method Pro. With a clean exterior that has only front and back vents, it’s surprisingly well-ventilated, with interior channels that help keep the air inside moving. However, a thicker, more plush lining has the helmet running a bit warm compared to options like the Method Pro. A supremely lightweight in-mold design at just 410g, we decided to keep it out of our top picks as we found other helmets to offer much better bang-for-buck. At $200, the helmet felt a bit overpriced to our testers.
The Giro Taggert has a clean design that fits in just about anywhere on the mountain. Photo: Nate Lemin//The Inertia
Best Ski Helmets Comparison Table
| Helmet | Price | Weight | Construction | Features |
| Smith Vantage 2 | $295 | 500g | Hybrid | 40 vents (top and sides adjust separately), Fidlock magnetic buckle, Mips, full Koroyd |
| Outdoor Master Kelvin 2 | $60 | 500g | Hardshell/Injection Molded | Mips, audio-ready earpads, removable lining |
| Smith Method Pro | $185 | 396 g | In-mold | Mips, Zonal Koroyd, Fidlock buckle, dial-adjust |
| Salomon MTN Lab | $290 | 365 g | In-mold | Merino lining, headlamp clips, multi-norm certified, |
| Bern Hendrix Mips | $150 | 500 g | Hardshell/Injection Molded | Bike and ski certified, brim |
| Sweet Protection Switcher | $285 | 600 g | Hybrid | Dial-adjusted vents, magnetic buckle |
| Smith Rodeo | $105 | 550 g | Hardshell/Injection molded | Mips, removable liner |
| Smith Summit | $260 | 448 g | Hybrid | Mips, Zonal Koroyd, triple-certified, Boa fit system, headlamp routing |
| Giro Owen Spherical | $280 | 514 g | In-mold | Mips Spherical, dialed fit, Fidlock buckle |
| Sweet Protection Ascender | $250 | 448 g | Hybrid | Pack-flat design, headlamp/goggle straps, Mips, dial-adjusted fit |
| Scott Flow Pro Mips | $230 | 500 g | In-mold | Mips, Fidlock magnetic buckle |
Testing ski helmets at Palisades Tahoe. Photo: Forrester Pickett//The Inertia
How We Tested
We’ve spent the past two seasons specifically testing ski helmets, but our focus on head protection goes back a good way further. After testing over the 22/23 season, we launched our Best Ski and Snowboard Helmets review in 2024, and have continued our testing since then, keeping the guide updated as new info or products became available. Mostly written and reviewed by snowboarders, in the fall of 2025, we renamed that article The Best Snowboard Helmets, slightly adjusting picks and tone to speak better to a snowboard-only audience. In January of 2026, we first published our Best Ski Helmets review, based on testing conducted for our prior reviews, as well as additional testing conducted during the 2024/2025 season to inform this new review.
Our lead tester for this review is Will Sileo, a surfer, skier, and snowboarder, who has also been testing helmets for our Best Snowboard Helmets review since it was first published. He brings his wealth of gear-knowledge to the table here, as The Inertia’s lead Gear Editor since 2020.
Our criteria for this review are comfort, features, price, durability, and style. Without access to a lab, we are unable to independently review impact protection, but when available, we point to Virginia Tech’s Snowsport Helmet Ratings guide.
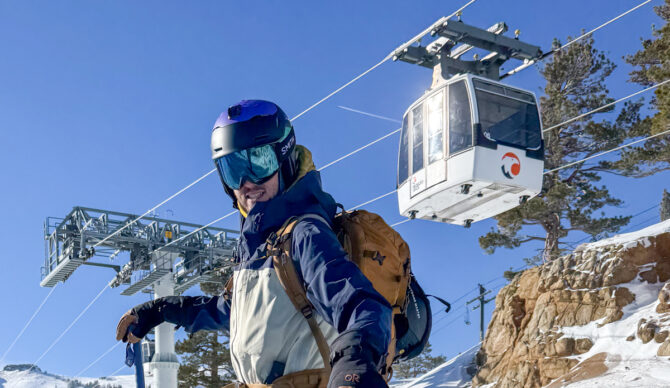
There’s a lot of great helmets on the market. Let us help you choose the right one! Photo: Will Sileo//The Inertia
Buyer’s Guide
What Makes A Good Ski Helmet?
The three main aspects that come together to make a great ski helmet are safety, fit, comfort, and style. We’ll discuss features in its own category further down.
Safety is our first and main consideration, because that’s why you’re wearing a helmet in the first place! However, this is a metric that can be difficult to measure. To get a better sense of how protective a helmet actually is, especially in comparison to other helmets on the market, requires side-by-side laboratory testing, which is beyond the scope of our abilities at this time. However, Virginia Tech, one of the most well-respected helmet-testing laboratories in the US, has done a test of snow helmets, which produced some interesting results. We consulted this, as well as other lab-testing conducted by various other outfits.
A dial-adjustment system is the best option for ensuring a snug, protective fit (as well as choosing the right size to begin with). Photo: Will Sileo//The Inertia
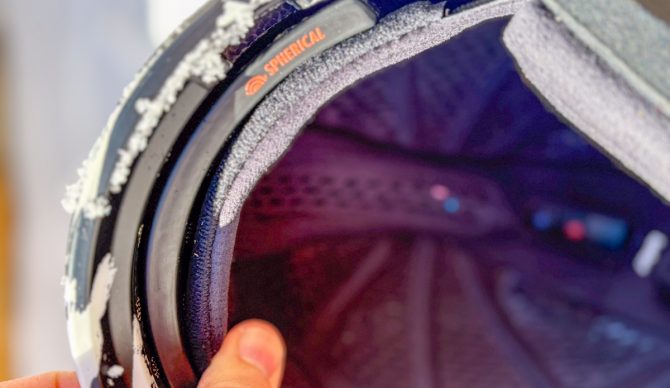
That said, one thing that we can measure regarding safety is fit. A good-fitting helmet is very important to ensure you get the best crash protection possible. Especially with the ball-in-socket designs of Mips-equipped helmets. Here, the inner lining needs to be snug on your head so it can produce that frictionless shift, which has been shown in laboratory testing to help dispel the rotational forces that result in concussions and brain injury. With this in mind, we tend to prefer, and rate more highly, helmets with dial-based fit adjustment systems (such as BOA), which do a great job of getting that perfect fit.
The inner lining on the Smith Vantage 2 is comfort-forward, but incorporates plenty of (adjustable) ventilation throughout to keep your temperature regulated. Photo: Will Sileo//The Inertia
And on that note, let’s look at comfort. Fit matters quite a lot here as well, and further down, we briefly discuss helmet sizing, how to measure your head, and generally what to look for to get the right size helmet when shopping online. However, there’s a lot more that goes into comfort than just fit. Other considerations include helmet ventilation, padding, and more. Higher-end helmets tend to use more comfortable materials and designs, while budget models often have less thought-out designs and lower-end materials.
Comfort matters because it’s the difference between loving the helmet you just spent a couple of hundred bucks on or hating it after your first day in it. Trying on a few options at the shop can help weed out the designs that truly wouldn’t work for you, but the only real way to know is to ski in said helmet for multiple hours. In this guide, we only recommend helmets we’ve found to be exceedingly comfortable, and often cycled between multiple testers to get a diversity of opinions.
We love it when a good ski fit comes together. Photo: Will Sileo//The Inertia
Style. You may scoff, but we’re talking about helmets for skiing here. And there’s no denying the importance of style out on the mountain. We’ve done our best here to curate a list that will appeal to everyone, from the backcountry experts to the park rats. However, when it comes to helmets, we encourage everyone to first and foremost prioritize choosing a helmet that is protective, fits well, and is comfortable, before taking a look in the mirror.
Thankfully, there are a lot of great options out there, and helmets are relatively neutral enough from a style standpoint that you wouldn’t look out of place wearing, for example, the Smith Vantage in a terrain park. Just remember – at the end of the day, it’s your turns that do the talking, not the helmet on your head. Some of the raddest skiers we know just wear old bike helmets when they’re out on the slopes (not that we’d necessarily recommend that).
We’ll discuss features in its own section below, but it’s worth mentioning quickly here as well. Some helmets have adjustable vents, additional protective systems, magnetic buckles, and more. Some are more bare-bones, but often have a bit more clean, less-techy styling, and usually lower prices.
The Smith Method is an in-mold helmet, with the shell and foam lining completely fused together. Photo: Will Sileo//The Inertia
Construction
Just like there’s more than one way down a mountain, not all helmets are constructed the same way. The two main methods are in-mold construction and hard shell (injection-molded) construction.
Helmets made via in-mold construction have the helmet made entirely in one piece, with the outer shell and inner foam lining fused completely together during manufacturing. Often found in higher-end helmets (though certainly not exclusively so), this allows for a thinner outer shell and, as a result, a lighter overall construction. Being constructed from a single piece of material also has the added benefit of allowing manufacturers to create better ventilation systems through the helmet compared to a hard-shell design.
The Bern Hendrix has a hard shell/injection-molded design, with a thicker ABS shell bonded to the foam lining. Photo: Will Sileo//The Inertia
However, in-mold helmets, with a thinner outer shell, tend to be less durable over time. They’re just as protective as a hard shell, but if you’re rough on your gear, often find yourself in the park, or are someone who throws their gear willy-nilly in the back of the car after a long day of skiing, it won’t be long before your helmet is sporting a few small dents or scuffs.
On the flip side, hard shell or injection-molded helmets have a thicker outer layer, or hard shell, usually constructed of ABS plastic, which is then glued or bonded to the inner foam lining, resulting in a heavier, but more durable helmet construction. That being said, both hardshell and in-mold helmets need to be replaced after major crashes or repeated minor impacts. Check out our section on “When to Replace a Helmet” below for more details.
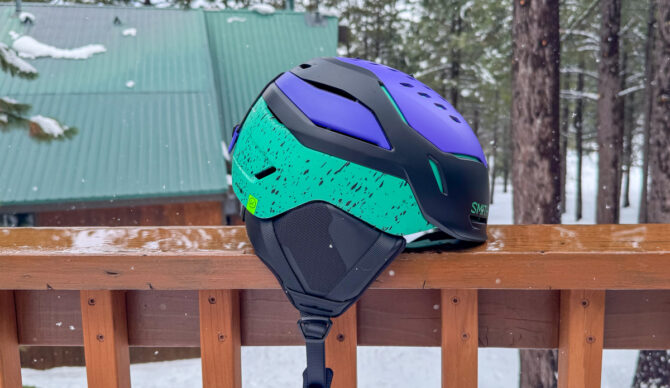
The Smith Vantage 2 has a hybrid construction with ABS shell on the front, top, and back, and an in-mold construction on the sides and lower back for weight savings. Photo: Will Sileo//The Inertia
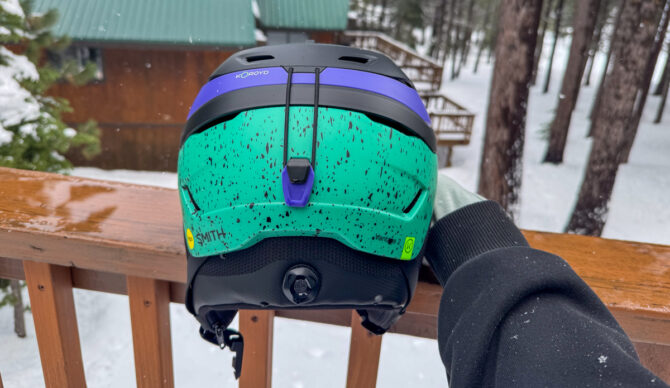
Some helmets use a hybrid construction for a best-of-both-worlds performance. For example, the Smith Vantage 2 sports a hardshell ABS upper over the top of the head for better durability where it will be needed the most (black and purple, above), and an in-mold lower section (green) to shave off weight.
Another difference in helmet construction comes from the type of foam that is used in the helmet to provide impact protection. The two main types are EPS (expanded polystyrene), which is used in most helmets, and EPP (expanded polypropylene). EPS provides great energy absorption, but on impact, it permanently deforms and needs to be replaced after a major hit.
EPP, on the other hand, is more elastic and can rebound back to its original shape, especially after a smaller/lower-energy impact. With this in mind, EPP can be a great choice for park riders who might take more, smaller bumps and want a helmet that will still keep them safe after doing so. However, it is more expensive and not quite as good at absorbing/dissipating energy from larger impacts as EPS foam.
The Giro Owen Spherical uses two layers of different foam material that slide against one another. Photo: Dylan Heyden//The Inertia
Different Types of Ski Helmets
With a rise in popularity, so too comes an explosion of options in the world of ski helmets. Here, we’ll take a brief look at the few main categories: All-around/resort skiing helmets, backcountry helmets, and park helmets.
All-around ski helmets are generally aimed at resort skiers, prioritizing impact protection, comfort, and features such as ventilation. These helmets can be further broken down into subcategories based on price range: budget, mid-tier, and premium helmets.
Budget helmets tend to use cheaper construction methods (injection-molded) and materials, have fewer, less adjustable vents, and simpler fit systems, and they tend to cost anywhere from $65-$120. Most of these helmets are Mips-equipped, but some are not. Examples include the Smith Holt and Giro Ledge.
Smith’s Method Pro brings some solid upgrades, such as Mips and Koroyd protection. Photo: Ken Cox//The Inertia
Mid-tier helmets often sport lighter in-mold constructions with better ventilation and fit systems, and cost around $130-$200. Almost all of these helmets have Mips, or a proprietary equivalent, and this is also where you see more advanced impact protection systems (such as Koyroid) begin to show up. Examples include the Giro Taggert and Smith Method Pro.
Premium ski helmets have it all. Hybrid constructions for lightweight durability, adjustable vents, BOA or other dial-based fit systems, magnetic buckles, and more. But they also cost a pretty penny, ranging from $200 at the low end to close to $400 on the high end. Examples include the Smith Vantage 2, Smith Nexus, and Sweet Protection Switcher.
Sweet Protection’s Ascender helmet has tons of always-open ventilation. Photo: Will Sileo//The Inertia
Backcountry helmets take things the other direction completely, optimizing for lightweight and the smallest pack size for extended touring missions. These helmets, like the Salomon MTN Lab or Smith Summit, tend towards in-mold or hybrid constructions, with lots of ventilation and minimalist, removable liners. They also often sport multi-norm certifications for activities like biking and rock climbing, perfect for those epic “bike to ski to climb” adventures or all-season use.
Park/freestyle helmets have a similarly minimalist design as backcountry helmets, but whereas backcountry helmets prioritize weight savings, park helmets are optimized for durability and low-profile, skate-inspired style. Often using a hardshell or EPP construction to handle repeated smaller knocks, these helmets tend to be simpler designs with non-adjustable ventilation, removable liners/earpads for skiers who want to run that classic beanie-under-helmet look. Examples include the Smith Rodeo, Bern Hendrix, or Giro Ledge.
The blue/green/yellow material you can see here is the Mips liner, meant to move with the head to absorb rotational impact in a crash. Photo: Will Sileo//The Inertia
Different Types of Protection Technology
Modern helmet technology has come a long way since the wool beanie of the 1960’s. Different materials and constructions have paved the way for safer headgear, but there’s also been some interesting technological advancements over the past 15 years or so. Around 2010, Mips (Multi-directional Impact Protection System) was first introduced. Mips places a low-friction layer between the liner and the foam of the helmet, allowing the shell of the helmet to rotate slightly around the head in the case of an angled impact, redirecting rotational energy away from the brain.
Some brands have their own proprietary versions of this, such as Atomic’s AMID (Atomic Multi-directional Impact Deflector) and Sweet Protection’s 2Vi, which are more directly integrated into the helmet’s construction. But overall, having some sort of rotational impact protection has become basically the industry standard for all helmets, except for the most ultralight backcountry models and dirt-cheap budget options.
Mips Spherical is another variation of the Mips system, used by some helmet manufacturers like Giro in the aptly named Owen Spherical, which forgoes the plastic liner in favor of two foam layers (one EPP and one EPS) that rotate against one another. The dual foam layers also provide improved impact absorption.
The small green label on the right-hand side here signifies a Koroyd-equipped helmet. Photo: Will Sileo//The Inertia
Another technological advancement in the past few years has been Koroyd. A honeycomb-looking piece of material, it is lighter and more ventilated than regular foam, and provides a more uniform energy absorption than EPS foam by itself. However, this tech really works best on linear, or straight-on impacts, so it is often paired with Mips to gain that rotational protection as well. Relatively new and a bit more expensive, this is mostly found on higher-end helmets.
Wavecell is another form of impact protection that combines the properties of Mips and Koroyd with collapsible crumple zones that flex, crumple, and shear to provide both the linear impact protection of Koroyd and the rotational impact protection of Mips in one structure rather than combining separate systems to achieve the same effect.
All of these helmet technologies have been proven to work to some degree in a lab setting. Mips really does reduce rotational forces, Koroyd really does absorb energy well from linear impacts, and Wavecell has been shown to do both as well. However, these technologies are not a silver bullet. The protectiveness of a helmet also relies on so many other factors, such as overall construction, fit, and (hopefully) proper use. Here, we can’t emphasize fit enough. Having a properly-fitted helmet that doesn’t move around on your head is the first and most important step in making sure your noggin is protected.

A dial-adjustment lets you get the perfect fit on your ski helmet. Photo: Dylan Heyden//The Inertia
Features
Boa/Dial Adjustment System
No matter how well-matched your head and helmet size are, you’ll need some way to cinch things down a bit, especially in a Mips-equipped helmet, if you want to reap the benefits of the rotational impact protection it provides. Our favorite adjustment systems are dial-based systems like BOA or proprietary versions such as Smith’s VaporFit or Giro’s In Form system. Having a dial allows for quick micro-adjustments and helps to achieve the tightest, most comfortable fit possible compared to most other helmet adjustment systems.
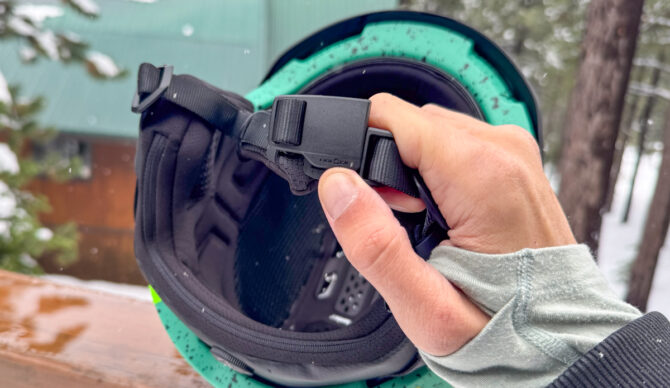
Photo: Will Sileo//The Inertia
Fidlock/Magnetic Buckles
We’re huge fans of Fidlock and other brands of magnetic buckles. Using magnets, these buckles allow for one-handed use, even with gloves on, snapping together as you bring the two pieces in contact with one another. And through interlocking geometry, they hold the helmet on your head just as well as a traditional buckle, but easily come apart in a similarly one-handed, glove-friendly action.
Smith is starting to integrate this tech into most of its mid to premium-tier helmets, as are other manufacturers. Sweet Protection has been doing magnetic buckles for years, and has its own proprietary magnetic buckle system that’s used on the vast majority of its helmets.

The Smith Vantage 2 has two sliders on top of the helmet to adjust the top vents and side vents independently. Photo: Will Sileo//The Inertia
Vent Adjustment
All helmets have some sort of ventilation, but adjustable ventilation is something reserved for higher-end helmets. Via a dial or sliders on the exterior of the helmet (Giro’s Owen Spherical is one notable exception with the adjustment on the interior of the helmet), one can adjust the amount of air the helmet allows in for skiing in colder or warmer conditions. We’d describe this as a nice-to-have feature, but not one that’s truly mission-critical.
Sweet Protection helmets have cupped earpads, which are super comfortable and help keep you hearing clearly, but can be uncomfortable with audio chips for extended wear. Photo: Will Sileo//The Inertia
Removable Earpads/Liners
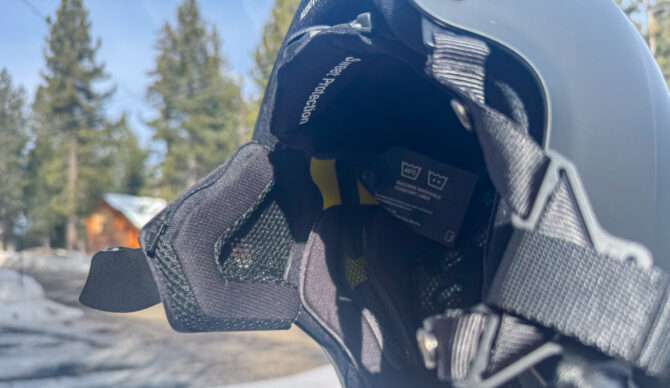
Something that’s especially important for the park rats among us, or those who want one helmet that will do it all from mid-winter powder skiing to spring slush, is to be able to remove the earpads or even the entire inner lining. This lets you rock a beanie under your helmet, or just keep things cool as needed. This is a critical feature for backcountry helmets (with most foregoing the earpads completely), especially if you intend to wear your helmet on the uphill when you’ll be putting out a lot of heat.
The Bern Hendrix has a nicely-sized brim that helps keep snow out of your goggles and eliminates any gaper gap. Photo: Ken Cox//The Inertia
A Brim (helps with goggle compatibility)
Some helmets, like the Smith Vantage or most Bern helmets, have a small brim or ledge at the front of the helmet right above where the goggles sit. While this might not be everyone’s favorite style choice, we’ve actually found this feature to be quite useful in pairing goggles and helmets from different manufacturers together, eliminating any possible “gaper gap” that might occur from a helmet and goggle that were not necessarily designed to work together.
A brim can also help deflect objects such as tree branches, saving your goggles from scratching. However, it’s worth noting that a brim can make it a bit more awkward to rest your goggles on the forehead of your helmet, as you have to navigate that extra piece of material to balance your goggles properly.
Sweet Protection’s Switcher is very audio-ready, with both earpads unzipping to let you put in audio chips. Photo: Will Sileo//The Inertia
Audio-Ready Earpads
It seems like everyone is rocking music out on the slopes these days, and while we won’t make any comments on the safety aspects of that, it’s worth noting that audio systems specifically designed for ski helmets are a safer choice than in-ear options, as they allow you to hear more of the world around you.
Many helmets these days are “audio-ready,” meaning the ear pads have special slots where you can insert a pair of audio pucks like Outdoor Tech Chips or the Aleck Nunchucks. These audio systems also provide the benefit of easy, glove-and-mitten-compatible controls with push buttons on the exterior of the device.
However, it’s worth noting that many, if not most, audio-ready helmets, with the audio chips inserted, can get a little uncomfortable after all-day wear, as the audio chips add some bulk to the earpads, and, being made of hard plastic, don’t conform to the shape of your ears.
However, this isn’t the biggest deal, really only a concern for bell-to-bell skiing, and taking some time at lunch to take off your helmet and shake things out helps a lot. Smith helmets tend to have removable earpad foam, which helps make more room for the audio chips when they’re inserted.
A dial-adjustment is the best way to ensure a snug but comfortable fit. Photo: Will Sileo//The Inertia
Helmet Sizing
Having a properly-sized helmet is critical for comfort, as well as safety. To properly measure your head (unless indicated otherwise by a specific brand’s fitting charts), we recommend using a soft tape measure and measuring the circumference of your head about one inch above your ears and eyebrows. You can also use a piece of string, and then measure the string with a standard tape measure or ruler.
Most helmets simply come in the usual Small, Medium, Large, etc., sizing, but some manufacturers (such as Smith) also make some of their helmets in what is often called a “round contour fit” to better fit people with, you guessed it, rounder heads. If you’re struggling to find a helmet that fits you properly without pain/pressure points on the sides of the head/temples, this might be worth looking into.
When trying on a helmet, you want the helmet to be snug, without any pressure points or pain points. If you are someone who likes wearing a beanie under their helmet, now is the right time to make sure your helmet adjusts wide enough to accommodate one – just make sure it also cinches down tight enough to wear without as well. Dial adjustment systems are great choices for this, letting you size up or down on the fly.
A critical fit check here to make sure your helmet is not too large is the shake test. Put your helmet on, cinch it down comfortably, and shake your head around. The helmet should move with your head. If it shakes separately or moves on its own, it’s too big.
Goggles and helmets from the same brand (Sweet Protection, here) should work together seamlessly. Photo: Ken Cox//The Inertia
Goggle Compatibility
Another good thing to check as you’re trying on helmets is goggle compatibility. If you have a pair of goggles already, it can be worth bringing them with you to try helmets on to make sure they pair well with the helmet you’re choosing.
What you’re trying to avoid is having what’s called a “gaper gap” of exposed forehead between your helmet and your goggles. Not only does it look a little silly, and has been the subject of ridicule on ski resorts for years now, but it can also leave your forehead exposed to potential sunburn or let in wind and snow where it’s not supposed to go.
Goggles and helmets from the same brand will almost always work seamlessly together. That being said, most goggles tend to work pretty well with most helmets. One small feature that can help with goggle-helmet compatibility is a helmet brim that extends over the top of the goggles, eliminating that gaper gap almost universally.

Photo: Ken Cox//The Inertia
When to Replace Your Helmet
There are a couple of different factors at play here. But as a general rule, skiers should look to replace their helmet every 3-5 years, crashes notwithstanding. The reasoning behind this is degradation of the material that happens over time due to environmental exposure, as well as exposure to sweat, hair products, and the like.
As for replacing after a crash, first and foremost, you should always replace your helmet after a major impact, especially one that leaves your helmet with signs of damage. This is especially true for a helmet made with EPS foam, which is designed to crush and permanently deform on impact to absorb the energy of a crash. Most ski helmets today are made with EPS foam.
EPP foam, on the other hand, is made to rebound after small to medium-sized impacts, meaning it’s somewhat of a multi-impact material. That said, if an EPP helmet takes a big impact or there’s visible damage to it, it’s definitely worth replacing as well.
Warranty and Crash-Replacement Programs
Some helmet manufacturers offer crash-replacement warranties or similar programs to encourage skiers to make the switch to a new helmet after a serious crash. Brands that we’re aware of having such a program include: Smith, Sweet Protection, Giro, Bern, and Oakley. In most cases, the brand offers a discount on a new helmet (usually around 30%) with proof of purchase (with a fairly recent purchase date) and evidence of the damage.
On-piste or hard-charging freeride, wearing a helmet is a must these days. Photo: Will Sileo//The Inertia
Final Thoughts
If you’ve made it this far, thanks for reading! Overall, we highly recommend any of the helmets listed here in this guide – if we didn’t, we wouldn’t have included them in our article on The Best Ski Helmets. So get out there, have fun, and stay safe while doing so!
Return To: Top Picks | Best of the Rest | Comparison Table | How We Tested | Buyer’s Guide
Related: Best Ski Bibs | Best Ski Jackets | More Ski Gear Reviews
